Livebook at Work
Mix.install([
  {:kino, "~> 0.6.2"},
  {:kino_vega_lite, "~> 0.1.2"}
])
Introduction
업무에서 Livebook 을 사용할 때 알아두면 좋은 팁들을 소개합니다.
livemd on github
nallwhy 님의 PR 덕분에 github 에서 렌더링 된 livemd 파일을 볼 수 있게 되었습니다.
Attached node 활용하기
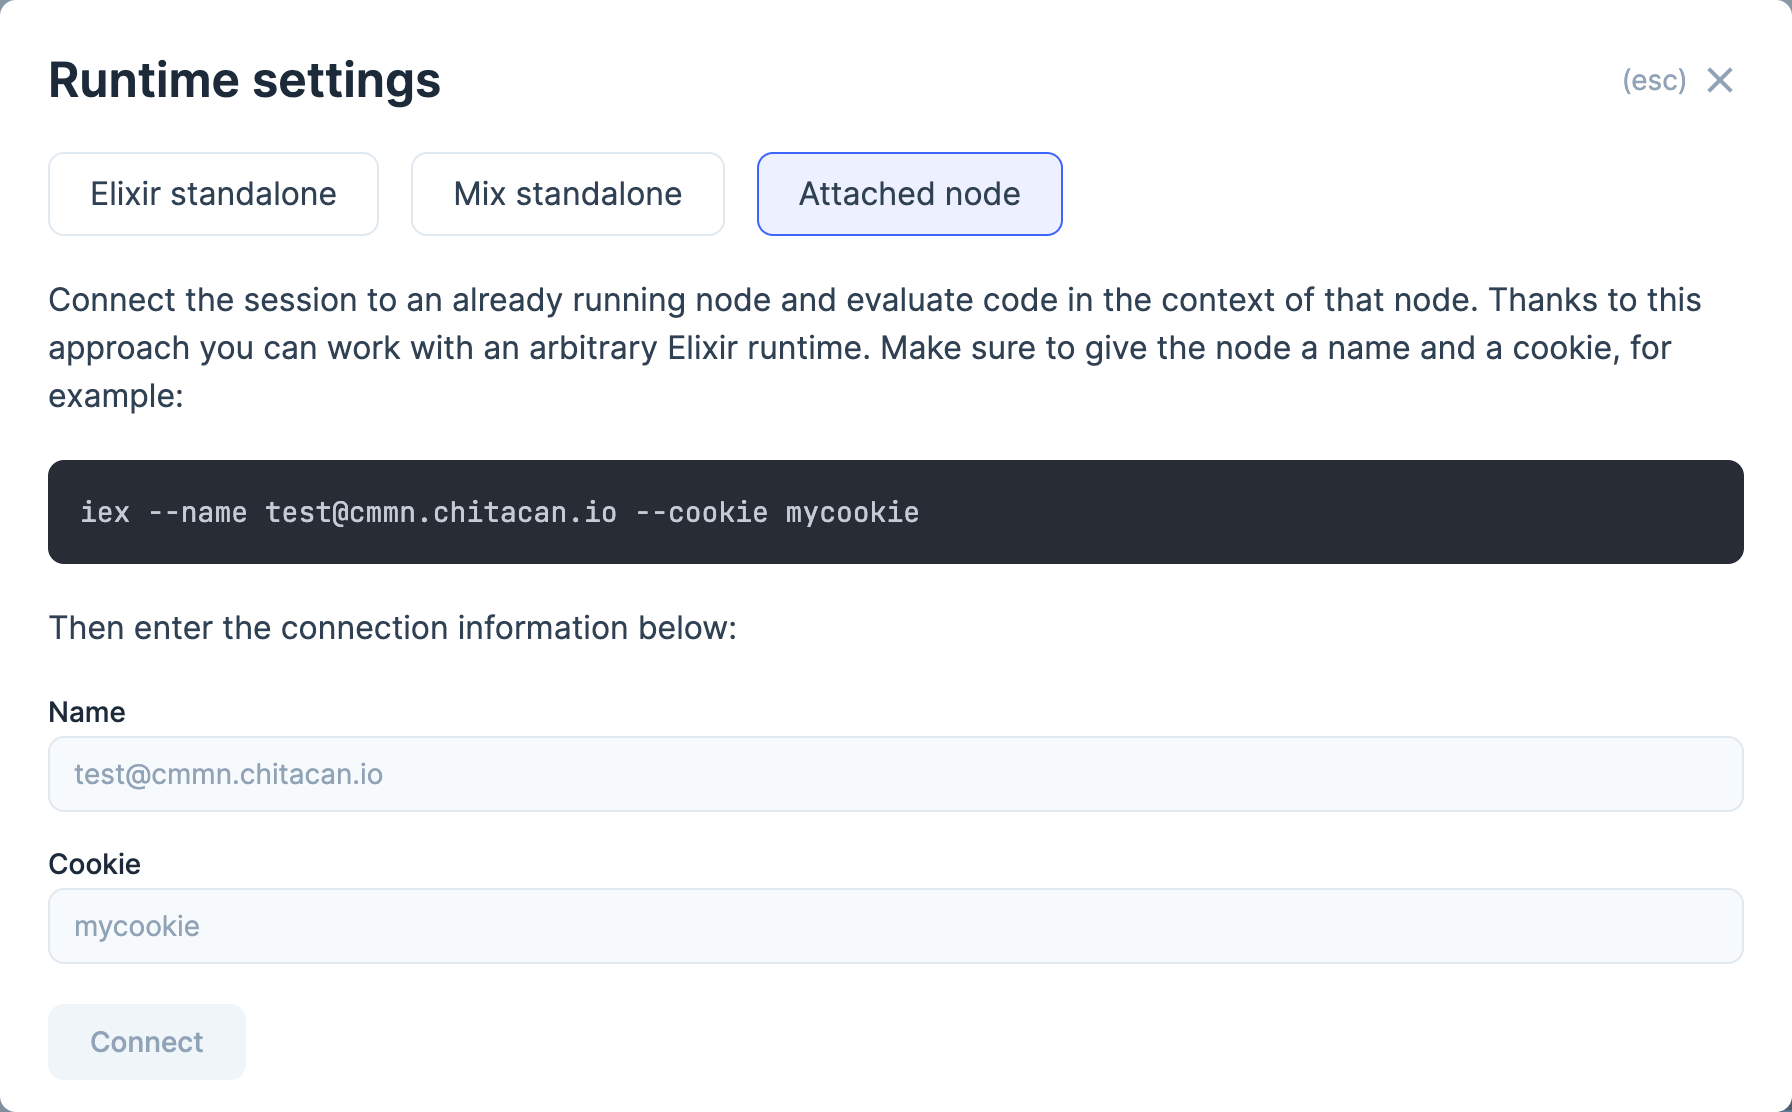
Livebook 은 기본적으로 Elixir standalone 모드로 동작하는데, Runtime Settings 메뉴에서 이를 변경할 수 있습니다. 여기서 Attached node 를 선택하면, Livebook 의 세션이 설정된 노드의 컨텍스트에서 동작하도록 설정할 수 있습니다.

Attached node 에서는 iex 처럼 노드에 로드된 모든 모듈을 사용할 수 있으며, 새로운 모듈을 선언하고 프로세스를 실행하는 것도 가능합니다. (아쉽게도 IEx.Helpers 는 사용이 불가능함 😓) 다만, Attached node 에서 선언된 모듈은 연결이 해제된 이후에도 노드에 남아있기 때문에 주의해서 사용해야 합니다.
momenti 에서는 Attached node 설정이 가능한 Livebook 컨테이너를 운영환경에 배포해두고, Livebook 을 사용해 다양한 작업을 수행하고 있습니다.
Kino 활용하기
Kino.Frame 으로 셀의 출력값을 컨트롤 할 수 있습니다. 셀의 출력값이 여러개인 경우 유용합니다.
frame = Kino.Frame.new() |> Kino.render()

Kino.Frame.append(frame, "first output")
Kino.Frame.append(frame, "second output")
Kino.Frame.append(frame, "third output")
Kino.Frame.append(frame, "4th output")

Kino.nothing()Kino.Markdown.new("""
**Markdown** 모듈을 사용해 마크다운 문법의 텍스트를 렌더링할 수 있습니다.
""")셀에서 프로세스를 실행한다면, Kino.start_child 를 사용해서 시작하는 것을 추천합니다. 셀이 다시 평가되어 새로운 프로세스가 생성될 때, 이전에 실행된 프로세스를 자동으로 정리해줍니다.
{:ok, agent} = Agent.start(fn -> nil end):c.pid(0, 263, 0) |> Process.alive?()Kino.start_child(%{id: :agent, start: {Agent, :start, [fn -> nil end]}}):c.pid(0, 277, 0) |> Process.alive?()Kino.DataTable 는 복잡한 데이터를 테이블로 깔끔하게 변환해 줍니다.
Application.started_applications()
|> Enum.map(fn {name, description, version} ->
  %{name: name, description: description, version: version}
end)
|> Kino.DataTable.new()
Kino.Process 로 어플리케이션 트리를 확인할 수 있습니다.
Kino.Process.app_tree(:logger, direction: :left_right)Kino.JS, Kino.JS.Live 를 사용해 javascript 로 렌더링되는 Kino 를 만들 수 있습니다.
defmodule Hello do
  use Kino.JS

  def new() do
    Kino.JS.new(__MODULE__, nil)
  end

  asset "main.js" do
    """
    export async function init(ctx) {
      const div = document.createElement('div');
      div.innerText = "hello";
      ctx.root.appendChild(div);
    }
    """
  end
end

Hello.new()
defmodule HelloFrom do
use Kino.JS
use Kino.JS.Live
def new() do
Kino.JS.Live.new(__MODULE__, nil)
end
def handle_connect(context) do
{:ok, nil, context}
end
def handle_event("from_js", _, context) do
IO.inspect("hello from js")
{:noreply, context}
end
asset "main.js" do
"""
export async function init(ctx) {
const button = document.createElement('button');
button.innerText = "hello";
button.addEventListener("click", () => ctx.pushEvent("from_js", []))
ctx.root.appendChild(button);
}
"""
end
end
HelloFrom.new()VegaLite 모듈을 사용해 Livebook 에서 만들어낸 데이터를 vega-lite 그래프로 표현할 수 있습니다.
alias VegaLite, as: Vl

Vl.new(width: 600, height: 400)
|> Vl.data_from_url("https://vega.github.io/editor/data/penguins.json")
|> Vl.mark(:point)
|> Vl.encode_field(:x, "Flipper Length (mm)", type: :quantitative, scale: [zero: false])
|> Vl.encode_field(:y, "Body Mass (g)", type: :quantitative, scale: [zero: false])
|> Vl.encode_field(:color, "Species", type: :nominal)
vega-lite 의 json 문법은 언뜻 보기에는 꽤 심플하지만, (매우매우) 괴랄한 문법을 가지고 있고 확장하기도 쉽지않은 구조를 가지고 있습니다. Kino.JS 를 사용해 다른 그래프 라이브러리를 의존성으로 가져와 Livebook 에 렌더링 할 수 있습니다.
defmodule Plot do
  use Kino.JS

  def new(url) do
    Kino.JS.new(__MODULE__, url)
  end

  asset "main.js" do
    """
    import * as Plot from "https://cdn.skypack.dev/@observablehq/plot";
    import {json} from "https://cdn.skypack.dev/d3-fetch";

    export async function init(ctx, url) {
      const data = await json(url);
      const plot = Plot.plot({
        grid: true,
        height: 400,
        color: {
          legend: true
        },
        marks: [
          Plot.dot(data, {
            x: "Flipper Length (mm)",
            y: "Body Mass (g)",
            stroke: "Species"
          })
        ]
      });
      ctx.root.appendChild(plot);
    }
    """
  end
end

Plot.new("https://vega.github.io/editor/data/penguins.json")
